Journal

Blog - Page 19

Thoughts on photography, technology, music, and creative work.

Hike: Echo Mountain, White City, Mt. Lowe Railway Ruins

This weekend my lovely wife Penelope and I hiked up to the ruins of the White City Resort on Echo Mountain.

The hike is nice and short, a little over five miles round trip. The trail is mostly unshaded and gains about 1,500 feet of elevation on the way up. We didn't get going until around 11:00 a.m. at which time it was quite warm.

Once we made it to the top the hard work was totally worth it. The Mount Lowe Railway was once an amazing railway built to service 3 small resorts. It ended up being plagued by various disasters and shutting down around World War II.

The ruins on top are quite interesting and include foundations, a cistern (see below) and the remains of the cable wheel and part of a train. If you like ruins and deserted places you will enjoy this hike.

We plan on returning, but in cooler weather and heading to the top of Mt. Lowe, which is another 3 miles past White City. If you go on this hike, bring plenty of water!

Penelope at the Mt. Lowe Pool

Penelope stands on the edge of the Echo Mountain House's cistern after hiking for a bit over an hour.

Click here to see more photos from our Mt. Lowe / White City hike.

August 4, 2008 Read more

Programming the Adruino and TLC5940 for LED Fun

Recently I wrote my first Arduino program to fade LEDs. Arduino is an open source electronics platform designed to be easy to use by "artists, designers, hobbyists, and anyone interested in creating interactive objects or environments." Basically it's a microcontroller that can be easily programmed to do fun things.

I am using a low cost clone called a Bare Bones Arduino. One of the best parts about the Bard-Bones Arduino clone is that it comes in a kit. Soldering stuff together is fun!

Previously I wrote about my adventures with a BASIC Stamp. The Arduino is very similar to a BASIC Stamp, but uses the C programming language instead of BASIC. This makes it more powerful and extensible.

In the past I had only written one program in C to control some serial port extenders. Writing in C for this Arduino project was a lot of fun and it showed me how similar C is to PHP, which I have been writing extensively for over 10 years.

The program I wrote was based on some code from Peter Mackey at Pixelriot. I changed it up a bit so I could control the LEDs fading on an individual basis. I then made it do a Knight Rider fade (see video below). Here is a link to my version of the Arduino 5940 code.

A short video showing pulsing LEDs triggered by an Arduino controlling the TLC5940 chip.

The code controls a Texas Instruments TLC5940 chip. The TLC5940 is an LED controller that can fade up to 16 LEDs to over 4,000 levels of brightness. You can chain the chips together to control around 400 total LEDs.

This first program is actually a proof of concept for a project I'm working on. I can't really talk too much about the project, but it will involve a whole mess of LEDs and an old school public art installation.

Currently I'm working on a new Arduino project that is a multipurpose long exposure, intervalometer and sound and light trigger for Canon cameras. I'll post more about that when it's done.

I'm really enjoying both writing in C and playing with electronics. Microcontollers are awesome.

Bare Bones Arduino and TLC5940 On Breadboard

This Bare-Bones Arduino clone connected to a breadboard is controlling a Texas Instruments TLC5940 LED controller which in turn is pulsing the LEDs

August 2, 2008 Read more

SAR: Highline Training

Two weeks ago my Search and Rescue team practiced a highly complicated technique known as a highline during our training at Deep Creek. Basically a highline is a rope across a canyon on which a litter and attendant can move both vertically and horizontally.

We started the day by lugging the huge amount of gear a highline requires to our destination. This gear included over a thousand feet of rope, over 50 pounds of hardware, rock protection, webbing, the litter and our personal packs.

This training was different from our usual highline training because one of our teammates was shooting photos on rope. We rigged a separate system for him about 10 feet above the highline so he could get a good angle.

The first part of rigging the highline was getting the rope across the gap. To do this we employed a giant slingshot that we used to launch a little buckshot filled bag. The bag is connected to a high strength kevlar thread. Once this is across we attached it to a heave line which we attached to the thread. We then reeled it back in using fishing pole. That line was then attached to the ropes which we sent back and attached to an anchor.

Once we had the track line rigged we rigged another line through a pulley at the far anchor. Then brought it back to a very large pulley called a kootenay which is where the litter hung from. This line was used to pull the litter out away from the haul team.

Another line was attached to the other side of the kootenay to pull it back towards the haul team. Finally one very long line was connected through the kootenay and down to the litter on a pulley. This line was the reave line and was be used to raise and lower the litter.

As you can probably tell this was a complicated system. It saw strength levels not normally seen in a standard rescue system so certain special features like high-strength tie-offs were used. High strength tie-offs use two prussiks (basically loops or rope wrapped around a larger rope) to increase the strength of anchor point tie ins.

Running the system was also non-trivial as the haul team had to respond to commands other than just up down and stop. They also had to to move the patient and attendant horizontally.

At the end of the day we actually did a great job of rigging everything and got set up in a reasonable amount of time. Especially considering that we also needed to rig a separate system for our photographer.

Kinsey Hanging

Hanging from a highline Mark Kinsey works as a litter attendant during a training session for the San Bernardino Sheriff's Cave Rescue Team

More photos after the jump...

July 29, 2008 Read more

Skid Row Photography Club

Recently I have been participating in the Skid Row Photography Club (SRPC). When I was part of the Downtown Los Angeles Neighborhood Council (DLANC) I requested funding for club which Michael Blaze started. DLANC ended up putting in $2,000.

Per the funding proposal I submitted, half of that money was to go towards purchasing cameras. We ended up buying six Fujifilm Finepix Z20FD digital cameras and six 2GB cards.

The 10 megapixel cameras remain property of DLANC, but each were assigned to a member of the SRPC. So far the participants have been very happy with their cameras. I have been ecstatic with the resulting images.

After a few more months of shooting, I will be curating a gallery show with prints from each member. We have another $1,000 in the budget to matte and frame the work. Any income from the sale of the photos will be split between the SRPC and the photographer.

It is inspiring to see the participants enthusiastically embrace photography. Each member of the club has their own style and interests. I am very excited about the upcoming show and this great group of photographers.

The Skid Row Photography Club meets every Tuesday at 3:00 p.m. in the UUCEP lounge on the corner of 6th and Stanford in Downtown Los Angeles. Everyone is welcome, no camera required.

Note: The Skid Row Photography Club is seeking funding and donations for more camera and computer equipment. We are also looking for a gallery or other venue to display the work during an upcoming Downtown Art Walk. If you know anyone how would be interested in helping, please let me know.

Skid Row Photography Club

Members of the Skid Row Photography Club pose for a group shot in the UCEPP lounge in Downtown Los Angeles.

July 16, 2008 Read more

Cave of The Winding Stair

Recently I took a trip that included 300 feet of rappels to the bottom of Cave of The Winding Stair. My Search and Rescue Team specializes in Cave Rescue. Every few months we do our best to train in-cave.

Last month we headed out to the Providence Mountains in the Mojave National Preserve. After camping overnight, we met up with some folks for the Barstow Mine Rescue Team for our joint in-cave-familiarization training (video of our previous joint training, in-mine). We then made our way on a relatively rough 4WD trail to the cave parking lot.

Being that we were doing a rescue scenario, we had to hump a good deal of gear. The trail is less than a mile long, but up the whole way. I prefer walking up-trail before caving. Walking up-trail caving is no fun.

Once inside the cave we split into two groups. The first group, which I was part of, was comprised of people who had never been in Cave of the Winding Stair. Our goal was to rappel down to the bottom and ascend back up while the second team prepared the rigging for the rescue scenario.

John Norman led our group, having been in the cave many times. He rigged each of the 3 drops and we rappelled down after him. The final drop was a 130 foot free hanging rappel. Fun!

We made it to the bottom of the last rappel in roughly two hours. Once there we climbed down to the lowest point of the cave and signed the register. After climbing back up to the main room we rested, snacked and then begun our ascent.

Rappelling is easy, you just go down the rope. Ascending is hard work. I use the Frog System which works well for tight squeezes and passing knots and rebelays. It's a real workout going straight up a rope, and even more challenging to go over an edge or through a squeeze. Either way, though, it was good fun.

As you can see in the photo below, I was wearing shorts. I probably should have worn pants as the rope ended up giving me an abrasion on my leg that made the final ascents painful.

Once we were back at the top of the cave in a section called "The Office", the second group had finished rigging the rescue scenario. To make things a bit more... interesting, we had two photographers from the Sheriff's department with us. We rigged a separate system for them which included an interesting winch-like device called a paillardet. The paillardet is great for raising and lowering a single-person load, but it weighs a ton.

We ran the rescue scenario successfully, pulling our mock patient, a litter attendant and both photographers out of the cave. Unfortunately I didn't get a free ride out!

Caving is great fun and I highly recommend it as long as your aren't afraid of tight spaces, the dark, spiders, bats, heights, exposure or getting dirty.

Me in Cave of the Winding Stair

This photo taken by my teammate Jen Hopper shows me hanging at the bottom of a 130 foot rappel in Cave of the Winding Stair.

July 14, 2008 Read more

Mount Agassiz: From Sea Level to 14,000 Feet

Yesterday I climbed a roughly 14,000 foot tall mountain in search of a missing hiker. As I've mentioned previously I am a Search and Rescue volunteer. The mission yesterday was my most physically demanding search so far.

It all started out on Sunday when I got a call-out for a mutual-aid search near Bishop, Calif. I put down my homemade wood-fired pizza and responded that I would be there in the morning.

Because Bishop is roughly 5 hours from Downtown Los Angeles I had to be up at 3:00 a.m. and on the road by 4:00. I threw my winter alpine, cave and 24-hour gear in the FJ and headed out to the San Bernardino County Sheriff's Office/Jail where we store our trucks and team gear.

At the SO I met up with John Norman and Mark Kinsey and we promptly hit the road to Bishop. Four hours later we were in Bishop and were given details about the missing hiker we would be searching for. We then proceeded to hurry up and wait (standard SAR operating procedure) for an assignment.

Finally around noon Kinsey and I were tasked with ascending Mount Agassiz to check the summit registry. The missing hiker always signed registries. If we didn't find his signature in the log we would effectively be narrowing the search area.

The Forest Service was running helicopter transport to our insertion point. They requested that we don Nomex flight suits as a precautionary measure, one which we've never had to do before. Once in our suits they dropped Kinsey and I off one at a time in Bishop Pass.

Bishop Pass is at an elevation of roughly 12,000 feet. Just a few hours earlier we had been at sea level. To say we didn't have much time to acclimate to the altitude would be a slight understatement.

We began our ascent of the western face of Mount Agassiz at 1:00 p.m. On the map and as the crow flies, the distance from the base to the peak is only about a kilometer. Of course that doesn't include the 2,000 vertical feet included in the walk up.

2,000 vertical feet in under a mile wouldn't be too bad if there was a nice trail up. Mount Agassiz has no trail, and every step of the way is on top of loose boulders ranging in size from gravel to VW Bus.

We made our way to the top in a little under 3 hours carrying 35 pound packs. The thin air had us stopping frequently to catch our breath. The loose rock made the ascent unnerving, especially when stepping on a large boulder caused it to shift.

Once we were at the summit we took photos of the register, snacked and then radioed in to the Command Post. They informed us that if we wanted a helicopter extraction we would need to be back down to the Landing Zone by 6:00 p.m. We radioed back our concern that we may need to push it to 6:30 or later. They told us that 6:30 was the latest we could be extracted.

We started on the descent, thinking that it would be faster on the way down. As it turned out it, scrambling down the loose boulders was more difficult than climbing up. When you step up on a giant boulder and it starts to move, you can simply unweight it. When you step down on a boulder and it moves you have already committed yourself and you can't just jump backwards uphill.

At one point I stepped onto a boulder the size of a refrigerator and it slid about 3 feet down the mountain. I surfed it until it stopped and quickly hopped to the side. That was interesting.

About half way down we called in to base and asked if there was any way we could be extracted later than 6:30. They said no. We decided to pick up the pace.

We ended up making it back to the landing zone right around 6:45. Lucky for us, the helicopter was running late. We threw on our Nomes flight suits just in time to catch a ride down the mountain.

Inyo Country SAR treated Kinsey and I to a nice dinner in Bishop and then we drove back to San Bernardino. I ended up getting home at roughly 3:00 a.m.

The mission was extremely taxing physically. Ideally we would have started our ascent closer to 9:00 a.m. Either way it was a great mission, although unfortunately we did not find the missing hiker. Hopefully he is ok and will be found safe and sound.

Update: Here area few articles about the search.

Update 2: Unfortunately DeVan did not make it. His body was discovered today.

The View from Mt. Agassiz

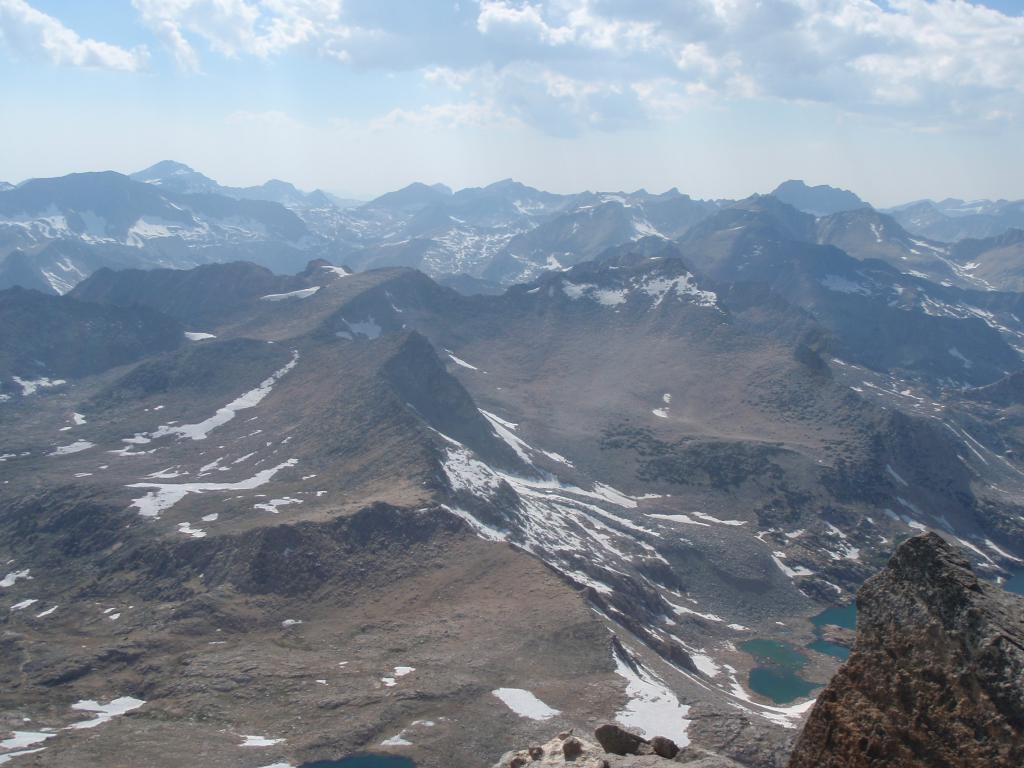
The view from Mount Agassiz as seen on July 7th during a search for a missing hiker.

More photos after the fold...

July 8, 2008 Read more